

Friday, 4 October 2013
Return of the wren
For some reason the local wrens don't spend a lot of time in my garden. Every other species of bird does including sparrowhawks and kestrels. I suspect it's the bounty of small birds that bring the birds of prey. But wrens come and go, never staying too long. This week the wren has come back. Who knows for how long. I did manage to get a photo though and managed to draw this graphite pencil piece.

Wednesday, 25 September 2013
Rough and tumble
Some of you will know about the badger cull in parts of England and how divisive it is. If you haven't heard about it you might want to check out this question and answer page by the BBC. It is a very sad state of affairs. These little guys may not be around too much longer.


Thursday, 19 September 2013
Bangles and Beads (and other stuff)

First up is a bracelet made using gold memory wire, a beaded cartwheel button (made using instruction from Gina's Making Even More Buttons DVD) and some paper beads made using Gina's Paper Bead Stencil Kit. I started out by using one strand of memory wire but felt it was too thin compared to the size of the button (see the picture below for the 'before' bracelet). So I added a second strand and used a soutache braiding technique to fasten the two strands together. Chunkier and more substantial.

Next is a coin purse that I came across. A lot of the things I make are targeted at women. However when I saw this purse I thought that it could make quite a nice masculine gift with the addition of a button. Worked in yellow, greens and cream, I think it adds a little bit of originality without being sparse.

And on the subject of the feminine objects I make, here are a couple of
tins/jars that I have decorated using Teneriffe lace that I made using a
Teneriffe lace kit .
I had never made Teneriffe lace until I tried the kits but it makes
some fabulous roundels that can be used on all kinds of crafts.

Monday, 9 September 2013
The beads, the beads!


I know!


Monday, 29 April 2013
Craft of the Month - Inkle Weaving

Weaving is one of those things that seems to flow from knitting and crochet, through spinning to its own delightful end. For some people, including myself, the act of making fabrics seems to start from the easier (and cheaper) crafts like knitting. Then the desire to make more and more fabrics might spill into the desire to spin your own yarns - be it wool, cotton or any other spinable fibre. Refinement of that desire might then end up with weaving. In my view it is the 'ultimate' in fabric production. It is where you can produce fine, soft, more practical and usable fabric unlike anything that knitting and crochet can form. However, it can be quite complex to learn, need time to learn and space to practice and is not a cheap craft to begin. Small, table top rigid heddle looms looms start at £135 ($150 US) and full size looms rise to thousands of pounds or dollars. As a result many people start with a small loom like an inkle loom. They are small table top looms that cost from £35/$63 This was my departure point for weaving.

Obviously I needed to find out a bit more about how inkle weaving worked. I ordered a couple of books from Amazon which are great - The Weaver's Inkle Pattern Directory by Anne Dixon and Card Weaving by Candace Crockett - but sometimes you need something a little more user friendly. So I hit the internet.
It turns out that inkle weaving is basically a way of forming woven bands by raising and lowering the warp threads on the loom. OK, nice and simple. I found lovely written instructions on how to weave on an inkle loom can be found at Weavezine.com. The article describe the process so much better than I could. But for those who prefer to see things in motion, one of the best videos I found on how to warp and weave on a loom is at YouTube. Also on Weavezine (which is worth a read through for lots of fun weaving projects and inspiration) is a great purse project for using the inkle loom (and proof that it doesn't have to be all about belts). As always Interweave has proven to be a wonderful treasure trove of information too. Their site for Weaving Today magazine has free information, projects ideas and a forum where you can chat with other new and established weavers.
The first time I sat down to weave I was nervous. Not that it is complicated in any way but I am a perfectionist and wanted to create something recognisable and not horribly deformed. Well, guess what? Within fifteen minutes I was producing a narrow band of weaving that had even tension, and recurring pattern and the weft threads were hidden beneath the warp threads rather than being exposed and uneven. I have to admit that I have not been able to weave as often as I would like due to family issues and work. But I have a feel for weaving. If there is such a thing as reincarnation then I must have been a weaver in a former life. It felt natural, relaxing and like I was born to weave. You can weave bands up to four inches wide on the loom I have but I have only woven thin bands about an inch wide so far.
Once you become a bit more advanced you can add weaving tablets to the loom to expand the patterns you can create. You can see how to warp a loom with cards here. Being an ancient history buff I love this short video about creating Roman style textiles with tablets. She does not use an inkle loom but the principle is the same.
Using the inkle loom is just my first foray into weaving. I would like to take it further at some point and try a larger loom but I still have a lot to learn about weaving before I get to that point. But as a taking off point I can highly recommend trying an inkle loom.
Monday, 22 April 2013
Of foxes and tigers

For those who do not know, I live with my 93 year old Grandmother. Until recently she was pretty much fit and able to do things for herself. However, last December she took a number of health issues including a small stroke so things have had to change. I don't get the chance to do a lot of drawing and painting these days with doctors, nurses and carers coming in regularly, not to mention visits from family members. So the house is a bit hectic. In the last few months though I have managed to draw these two 1.5x1.5 graphite drawings. Being so small they don't scan too well but I think they are pretty cute.

On the subject of foxes, last night we had the most amazing evening sun. It made the whole countryside glow. During the sunset a fox looking for a meal trotted through the field in front of the house. It was a stunning sight - and wouldn't you know it, by the time I'd grabbed my camera the fox had gone. Typical.

Friday, 29 March 2013
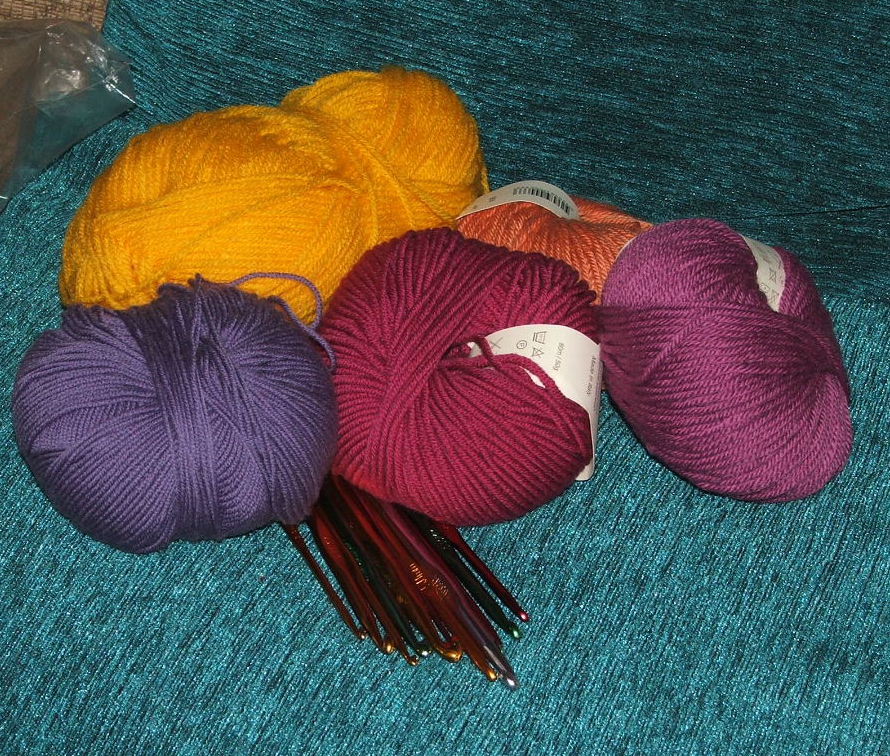
Craft of the Month - Crochet
Crochet was another craft I always wanted to try. Unfortunately, before the invention of the internet and YouTube, you either had to be taught to crochet by someone you knew or from illustrations in a book or pattern. Oh dear! I never knew anyone who crocheted so I had to try and read those illustrations. It never worked. I tried several times but I couldn't grasp it. Two years ago it suddenly dawned on me that there was bound to be 'how to' videos online. I found Nexstitch's website that had cute little videos of one stitch at a time and I picked it up immediately. It was amazingly simple. After all those years I could crochet.
Just so you are aware, I should mention that there is a difference in crochet stitch names for British and US crocheters. I did not know this at the time so I ended up learning to crochet American style. The difference between the two sets of terms is not that great though. British crochet starts with it's most basic stitch as the double crochet but US crochet starts with single crochet. The rest are as follows:
British - double crochet (dc) / US - single crochet (sc)
British - half treble (htr) / US - half double crochet (hdc)
British - treble (tr) / US - double crochet (dc)
British - double treble (dtr) / US - treble (tr)
British - triple treble (trtr) / US - double treble (dtr)
As you might expect, my first attempts were not brilliant. They were recognisable as crochet but I had problems remembering to catch the last stitch on a row. As a result my first scarf (the one below) started off five inches wide and ended up three inches wide.

However it wasn't long until I was producing much better results. I headed to the Lion Brand website where they have lots of free patterns and a Learning Centre and joined Ravelry. I advanced from scarves (including the pink one made using a jumbo crochet hook and four different yarns at once) to fingerless mitts and to a beanie hat (which has come in very handy this winter).


My current crochet love is freeform crochet. I came across the 'Freeform Crochet and Beyond' book by Renate Kirkpatrick and fell in love with the colours and textures that can go into making bags, hats, scarves, or anything else your imagination might demand. Renate has a website which has loads of inspiration and instruction on different crochet stitches like bullions and puff stitches. It has opened another door to the possibilities that crochet offers.
Sunday, 24 February 2013
Craft of the Month - Spinning
I have wanted a spinning wheel since I was a teenager. There is something about starting with a raw material and producing something from scratch that appeals to me. It reminds me of the 'good old days' when people had to be creative in order to survive - although that might have more to do with my desire to always be doing something creative rather than the romance of the issue. Without skills like spinning, weaving, crochet and knitting we would either have frozen to death or had to evolve a good covering of hair to cover ourselves.

I finally got one last year for my 40th birthday so I had to hit the web to find out some basics on using it before I could really start. First port of call was Ashford's own web site as they provided my wheel. Other brands of wheel have their own web sites so I would recommend starting there of you have a different brand of wheel. It has information on wheels, looms, etc but also some hints and tips and free patterns in the 'Inspiration' section. Further hints and tips can be found at Handspinner.co.uk in the 'How to' section. For those who like magazines and communities of like minded people, Interweave has just the thing - Spin Off magazine has a web site full of inspiration, helpful free articles and people to chat too. I spent hours looking through all these sites picking up what I could so that I knew what I was doing - or at least looked like I knew what I was doing.
This video from Ashford was a huge help in showing me how to start off properly but my first spun yarn was still awful. It looked like a worm had exploded. It was chunky and ugly and fraying and unravelling - sorry, no pics as I disposed of the embarrassment as quickly as I could. It took a while to get to grips with adjustments that the wheel needed in order to produce a tight spin. The information was all there in the information booklet I received with the wheel but it took some tweaking to find the right setting. But I got there in the end and while the next piece of yarn was only a little better than the first, the third piece was leaps and bound better. By then I felt confident enough to try spinning some of the beautiful hand dyed Devon tops that I had bought on Etsy. I still had to tweak things a bit here and there but got into my stride very quickly and eventually had two bobbins full of yarn that had to be plied or twisted together. That worked out much easier than I expected and I soon had 100g of spun Devon tops as my very first yarn. It was the culmination of 25 years of fantasy over spinning and I wasn't disappointed.

Yay! I could spin! So I spun some more.

One important piece of information that I found was not emphasised in my online quest was wheel maintenance. I did, however, find two helpful items - one set of written instructions on looking after your wheel and Ashford's maintenance video. If you do think about getting a wheel then do bear in mind that you need to oil the bearings regularly. It took me three months to remember to buy spinning wheel oil and in that time my wheel developed a nice squeak. All sorted now though.
For those who can't afford a spinning wheel or who don't have the attachment to them that I do, I can recommend spinning with a drop spindle. Before I got my wheel I used a spindle and it produced a very nice yarn simply and quickly (see the picture below for yarn spun with the spindle). Spindles can be picked up quite cheaply (from £8 in the UK and $7 in the USA) or you can buy kits including a spindle, fibre to spin with and written instructions for a little more. You can see a nice little video here that is less than five minutes long. For a small outlay and five minutes of learning time this could be a nice little skill to pick up - especially if you are a knitter, crocheter or use yarn for any other creative uses.

These yarns were all spun with a spindle after a short online lesson. I have since used them to crochet with and they were lovely to use.

So there you have it, spinning. A new skill that allows you to create something from very basic materials to create yarn and fibre for clothing, toys or decoration. I hope the links I have provided will help you wade through the myriad of online sources. There are, of course, many other sites that hold information but when you want to get stuck into trying a new craft sometimes you just want accurate information as quickly as possible. If you have any other recommendations for links though please do leave a comment so others can find it too.
Friday, 22 February 2013
Springtime badgers


Monday, 18 February 2013
Follow by e-mail
Just a quick note to let you know you can now follow my blog posts by getting them delivered by e-mail. Just fill in your e-mail address in the box on the right had side of the page and every time I post a new entry you will get an e-mail. I hope that helps those of you who like getting e-mails instead of checking blogs every day.


Monday, 28 January 2013
Tassels, tassels everywhere
I spent the weekend making new samples for Gina B's next show. Tassels were part of the menu as I had four to make for a cushion cover. However, I couldn't decide which style I wanted. The cushion cover itself is a cute modern style so I didn't want anything too traditional. But the beauty of tassels is that they adapt to their environment. So if you are doing something modern there is a modern looking style to go with it. I eventually kept it simple and added some bling in the form of beads. I can't show you the finished cushion right now (you will have to tune in to Freeview 22, Sky 671, Freesat 813 or online at createandcraft.tv on Sunday, 3rd February at 5pm GMT to see it) but can show you the finished tassels.

I also ended up making an impromptu keyring using a hand painted bead with a wide hole and some offcuts from the tassels. The beauty of paper beads and tassel making is that you never run out of keyrings.

Friday, 25 January 2013
Craft of the month - Paper Beads
First up as Craft of the Month is, of course, paper bead making. For those of you who don't know I make paper beads and sell them through Etsy. I have had a few people asking me recently how I make my beads. Unfortunately I am a bit like an overprotective chef guarding her secret ingredients when it comes to my techniques. However, there is a host of information on the web about making a myriad of different styles of bead. One of my favourite web sites is Paper Beads. There are tutorials on just about every shape of bead you can imagine (check out the tutorials in the 'Paper Bead Creations' tab at the top of the page) and loads of inspiration on using them.Another great site is I Love Paper Beads where there are some cute ideas for using less usual materials like glow in the dark paint.

You can use paper beads without coating them but adding varnish will add to their longevity. I have heard of paper bead makers using everything from clear nail varnish to protective finishes for wood. Polyurethane seems to be quite popular (although I have not used it) as is embossing powder and paper glazes like Diamond Glaze. Again, the choice is yours - although I would not advise the clear nail varnish as the smell is hard to get rid of. Try some of them out and see which you like and which does the best job for your needs. Paper glazes are certainly the easiest to use, being easy to apply, quick to clean up and speedy to dry to a pretty hard coat. If you are a beginner it is certainly the easiest place to start.
Those who follow me on Twitter or Facebook will know about the honour I received last year when asked to join Gina Barrett's design team. As a result some of my paper beads are displayed on Gina's web site and regularly on the Create and Craft TV channel. You can see some of them here along with other design team projects using handmade beads, cords, buttons and tassels. Gina has developed a couple of very useful tools for the paper bead maker. The Paperlathe is mainly used to produce paper based tassel moulds but there are also a number of bead templates on the CD-rom along. The bead templates are marvellous and produce beautiful big beads that are ideal for large projects and focal beads like those in the bracelet and on the tag below.


The Paper Bead Stencil Kit is, as the title suggests, a stencil that allows you to produce much smaller beads in a variety of shapes from paper or fabric, an acrylic rod for rolling the bead and instructions on how to do it. The beads they produce are great for decorating cards or scrapbook pages and as spacer beads in jewellery - and you can make them in any colour you need. Perfect colour matching every time. In the photo below you will see a ring, a mobile phone charm and a bag charm all made using the Paper Bead Stencil Kit - with the exception of the large orange bead on the bag charm which was made with the Paperlathe. The photos show the variety of projects you can use them on.

These earrings were also made using the Paper Bead Stencil Kit ...

... as were the felt beads on these mobile phone cases.

So, that was month one of the Craft of the Month posts. I hope you found something worthwhile in there. I have not decided what next month's post will be about so I guess it will just have to be a surprise.
New monthly posts - Craft of the Month
At the start of the year I had a thought. I am a Gill-of-all-trades, well known for trying as many arts and crafts as I possibly can. Last year was no exception and I expect that this year won't be either. Since the turn of the year, I have learned to design and make my own handbag and painted pears with Martha Lever - both of which have given me hours of pleasure. So I thought I would try and inspire others to try a few new things by writing a post every month about my experiences with each craft and list some of the more helpful articles, books, web sites and videos I have come across alongside some photos of my attempts. On the list so far, and in no particular order, we have paper bead making, crochet, spinning, inkle weaving, tatting, bag making, felt making and painting & drawing. No doubt more will be added to the list as the year goes on but hopefully I can add a little inspiration and perhaps remove a little frustration for those who are looking for information about certain arts and crafts.
So, with no further ado, on to the first Craft of the Month.
Monday, 21 January 2013
Mini drawings


Subscribe to:
Posts (Atom)