Showing posts with label how to make. Show all posts

Sunday, 13 October 2019

How to make a glued notepad

One of my new Etsy products is a digital download of notepad pages that can double as journal cards for memory books, journals and scrapbooks. 


However I recently discovered how to make your own glued notepads while looking for something else entirely. Isn't it always the way? My first notepad was made using scraps of leftover paper. But it is so simple that I wanted to make something a bit more decorative and realised my art made the prefect subject matter for some cute notepads to scatter through the house. 

Tools and materials:

10 printouts from the PDF included with these instructions. I use plain copy paper in 70-100gsm (roughly 20 - 24lb in the US).

Tacky PVA glue (It has to be tacky glue that is nice and thick. I use Aleene's Tacky Glue.)

Paper trimmer or scissors

Spring clamps

Method:
  1. Print out ten copies of the notepad papers. That makes 40 sheets of paper for the pad. I used the printer's standard settings but you can use a higher quality print if you prefer.
  1. Cut each of the sheets out using the grey outlines as a guide.
  1. Bundle all of the sheets together and make sure all the sides line up and are straight, especially the top edges. Clip the bundle of papers together near the top of the pad using the spring clamps. You want the top of the bundle of papers to be nice and tight and firmly squeezed together.
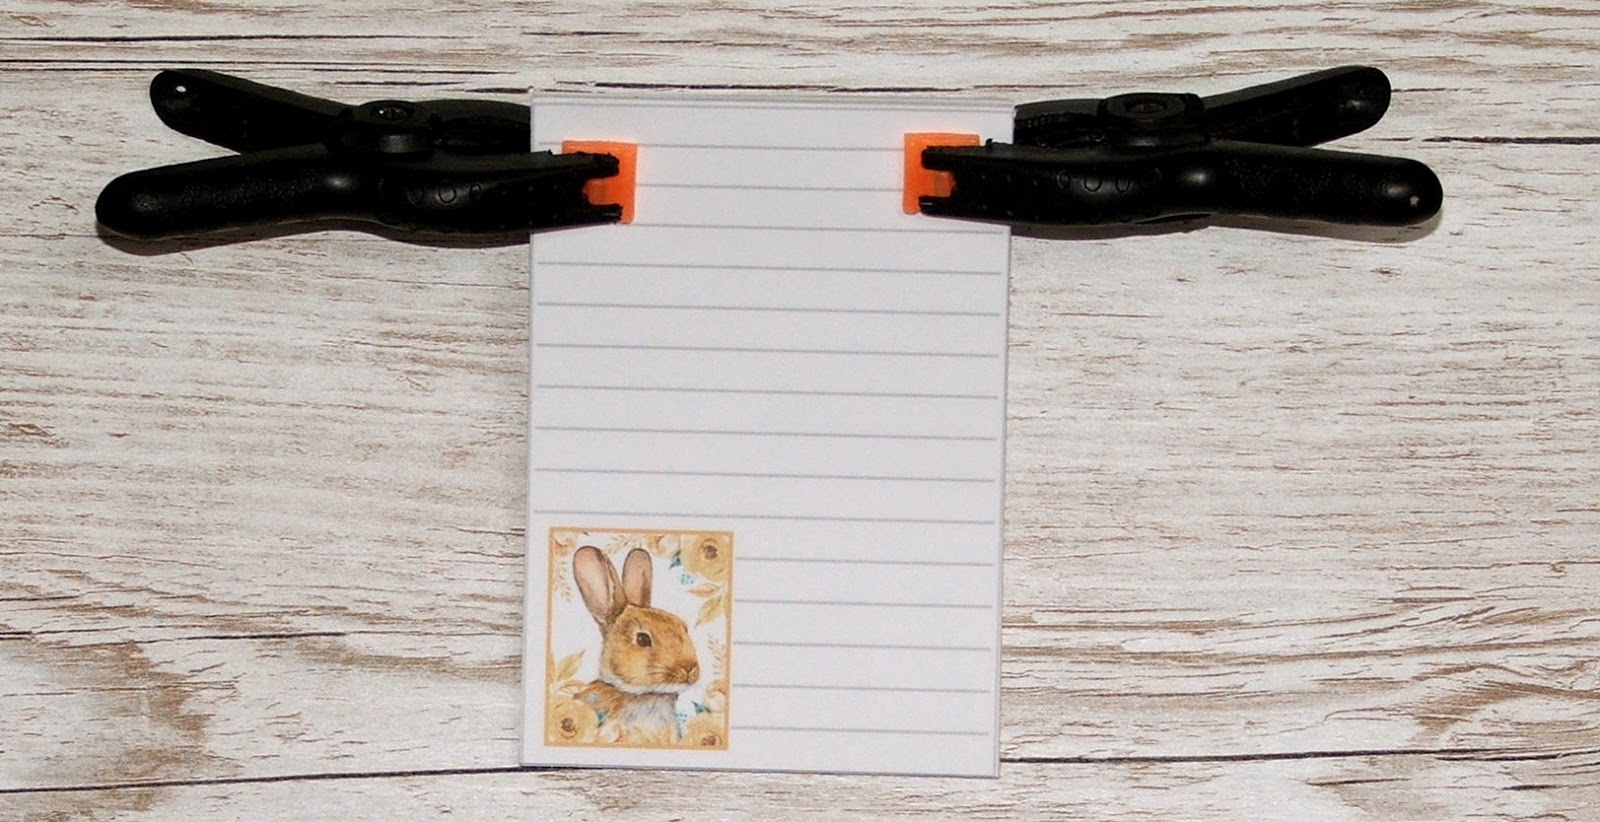
  1. Take the top off of the tacky glue and squeeze a generous amount along the top of the paper bundle. You want to smooth it out either using your finger or a little piece of card but don't mash the glue into the top of the paper or you will get glue oozing in places you don't want it. Let that layer dry. Then squeeze a second layer of glue on top of the first once it has dried. Again, make it a generous layer, smooth it out and let it dry.

That's it! You have a great little notepad using some cute images.

Alternative ways to use the sheets

Instead of using the glue method, you can hold the sheets together using a fancy bulldog clip or punch holes along the top of the pad and fasten the sheets together with string or hinged book binding rings.  


You can also use the sheets for journaling or scrapbooking too.


Saturday, 13 July 2019

New round, chunky paper bead tutorial

After five years I actually have a new paper bead tutorial for sale on Etsy. The EU's digital VAT (sales tax) on digital products put me off writing any more. However Etsy seem to be handling the submission of tax receipts to all countries now and with Etsy's changes to their search system I need to diversify a bit more. More digital products will be on the way including some new ones incorporating my art.

Anyway, about these beads, I saw this round chunky style of paper bead made in polymer clay, and more recently in ceramic, and love the shape. Something a little different from the usual style of paper beads but still very simple to do with a round paper punch. I actually came up with the idea three years ago but it has take me this long to think about making it into a tutorial - ahem!

round chunky paper bead tutorial digital download

They make great additions to bracelets, earrings and necklaces. You can choose the colours to suit your project and add any decorations you like - or leave them plain. You can also use them to decorate journals with planner charms or bejewelled bookmarks. As they are so light you can use them and not worry abut the weight.

round chunky paper bead tutorial digital download samples

As part of my digital download production line, I have a couple more tutorials in the pipework and hope to have them available soon.

Sunday, 17 February 2019

Journal Planner Charm Tutorial

Planners seem to be a big thing this year. Big ones, small ones, red ones, blue ones. OK, I'm starting to sound like Dr Seuss. But they do seem to be everywhere on blogs, YouTube and Facebook. Not to mention every kind of accessory you can imagine - and yes, I have been caught up in it all. I have not only bought several journals recently but I have been making them too. More on that in a future post.

However, among the accessories I am seeing is 'journal jewellery' - planner charms that hang from the elastic of travel journals. When I saw the cute little charms I knew that my paper beads were ideal for the job - and so this little tutorial was born.

journal charm


Materials:
Wide hole beads (the ones here were made by me and, sadly, no longer available for sale)
Silk cord (available in my Etsy store)
Lobster clasp (or other clip for attaching the charm)
4mm jump ring
Thread (roughly 10-13cm (4-5 inches)

Tools:
Scissors
Pliers


how to make journal charms

Method:

1. Cut a length of silk cord roughly 20-25cm (8 -10  inches) long. The longer the thread is the easier it will be to tie the knots in it. Fold the length of cord in half.


2. Place a piece of thread between the fold of the cord so it can be folded in half too. You are going to use it like a needle to thread the bead onto the cord.


3. Push both ends of the thread through the bead hole until they come out of the top. Then pull the bead onto the silk cord.


4. Tie a knot in the top of the cord where the fold is leaving a small loop to attach a jump ring onto.


5. Pull the bead up to the knot and tie a second knot underneath the bead.


6. Take the two loose ends of cord and tie one knot in each tail. Make the tails as long or as short as you like. Trim any excess cord from the ends.


7. Use pliers to attach a lobster claw using a jump ring.


8. That's it! Clip the charm into your journal. You can also use them on bags or as knitting and crochet stitch markers too.


journal jewellery

Please excuse the not-so-brilliant photos this time. It has been dull, grey and blowing a gale for the last two days and I could not get outside to take decent sample photos. Roll on Spring!