Showing posts with label tutorials. Show all posts

Thursday, 2 April 2020

Ideas for what to do in a global pandemic

I hope everyone is keeping well and safe right now. This is my first blog post of the year. Who would have thought I would be writing about a global pandemic? It has been a strange few weeks that have turned things on their head for many people. With all the stuff on TV and on social media, it is all too easy to slip into a place of anxiety. My parents are both in their 70s with health issues so trying to keep in my usual work routine has been a bit of a challenge. Thank goodness for meditation and yoga.

I have to admit that I am not much of a socializer. My idea of a wild night out is badger watching. So being in lock down has not been as difficult for me as for some people. However, if you are finding being at home a lot a bit of a challenge then I have a few ideas for helping pass the time and lessening the anxiety.


1. Try to limit your exposure to the news, be it on the TV, radio or social media. It does make a difference. While many of us will want to keep up to date with current affairs, being constantly bombarded with information about the crisis wears us down. I watch the headlines in the morning and the evening news to hear the government's latest advice. Other than a quick social media check-in twice a day, I stay away from Facebook. The time will come when I can go back to my usual routine - but right now I need to step away.

2. Focus on what you can control rather than what you cannot. Covid-19 is going to do what it is going to do. We have no control over that. We do have control over washing our hands regularly, not touching our faces (which makes it easier for the virus to enter the body) and following the rules set out by our governments.

3. Try new things. If you have ever wanted to try a new, craft, learn about a new subject or speak a new language then this is a great time to do it. It does not have to cost you money. You Tube has some great 'how to' videos on almost every craft you can imagine. Future Learn offers free short online courses in a huge variety of subjects areas, from professional classes to history and science. There are even classes on dealing with Covid-19. Duolingo is a free language learning app and web site and has 35 different languages available - including Latin and Klingon. Currently I am taking a business course, several art courses and am thinking of learning a little Spanish. It all helps keep my brain from running away with itself.


4. Ever wanted to read some classic literature but can't find the time? Audible is currently offering free access to some of the classic literature, e.g Frankenstein, Jane Eyre, A Brave New World, Anne of Green Gables or Winnie the Pooh. It is only a small collection as it is aimed at children who are being home schooled right now. But it is a nice selection to listen to while you craft, exercise, tidy up, etc.

5. Do you have any 'work in progress' pieces that you never got round to finishing? Yes, I am guilty. I have a badger painting and two ladybird paintings that I want to get finished on top of several knitting projects and now is as good a time as any.


6. Yoga and meditation. As a sufferer of anxiety, I fall back on both yoga and meditation regularly. I have practised both for over 20 years and have found them invaluable for my mental health. If you are interested in checking them out, there are a wide variety of yoga/meditation videos on YouTube to suit different tastes - but I can recommend Yoga with Adriene for yoga. She is enthusiastic and encouraging - and has a cute dog who helps too.

You can find lots of different kinds of meditation videos and podcasts out there too, ranging from guided meditations to natural sounds. Future Learn also has a few courses on mindfulness if you want to learn a bit about it. However, a simple meditation practice consists of breathing in slowly through your nose while counting to eight, then releasing the breath slowly through your nose for a count of eight. Repeat as often as you need to. I use it most days when things get on top of me and it does help me slow down.


Finally, if you are looking for some simple tutorials to follow during this quiet time, I have a few free ones on my blog. The links are below.

Simple silk bracelet tutorial
Silk cord and paper bead bracelet tutorial
Journal Planner Charm Tutorial
How to make a glued notepad

I also have a few paper bead and jewellery tutorials for sale on Etsy which you can find here. There is lots of inspiration in them as well as clear photos and instructions on making jewellery components, bracelets from paper and paper beads.


I hope the links and information above helps someone out there. The world is out of sorts right now but I hope it will find balance again very soon.

Sunday, 13 October 2019

How to make a glued notepad

One of my new Etsy products is a digital download of notepad pages that can double as journal cards for memory books, journals and scrapbooks. 


However I recently discovered how to make your own glued notepads while looking for something else entirely. Isn't it always the way? My first notepad was made using scraps of leftover paper. But it is so simple that I wanted to make something a bit more decorative and realised my art made the prefect subject matter for some cute notepads to scatter through the house. 

Tools and materials:

10 printouts from the PDF included with these instructions. I use plain copy paper in 70-100gsm (roughly 20 - 24lb in the US).

Tacky PVA glue (It has to be tacky glue that is nice and thick. I use Aleene's Tacky Glue.)

Paper trimmer or scissors

Spring clamps

Method:
  1. Print out ten copies of the notepad papers. That makes 40 sheets of paper for the pad. I used the printer's standard settings but you can use a higher quality print if you prefer.
  1. Cut each of the sheets out using the grey outlines as a guide.
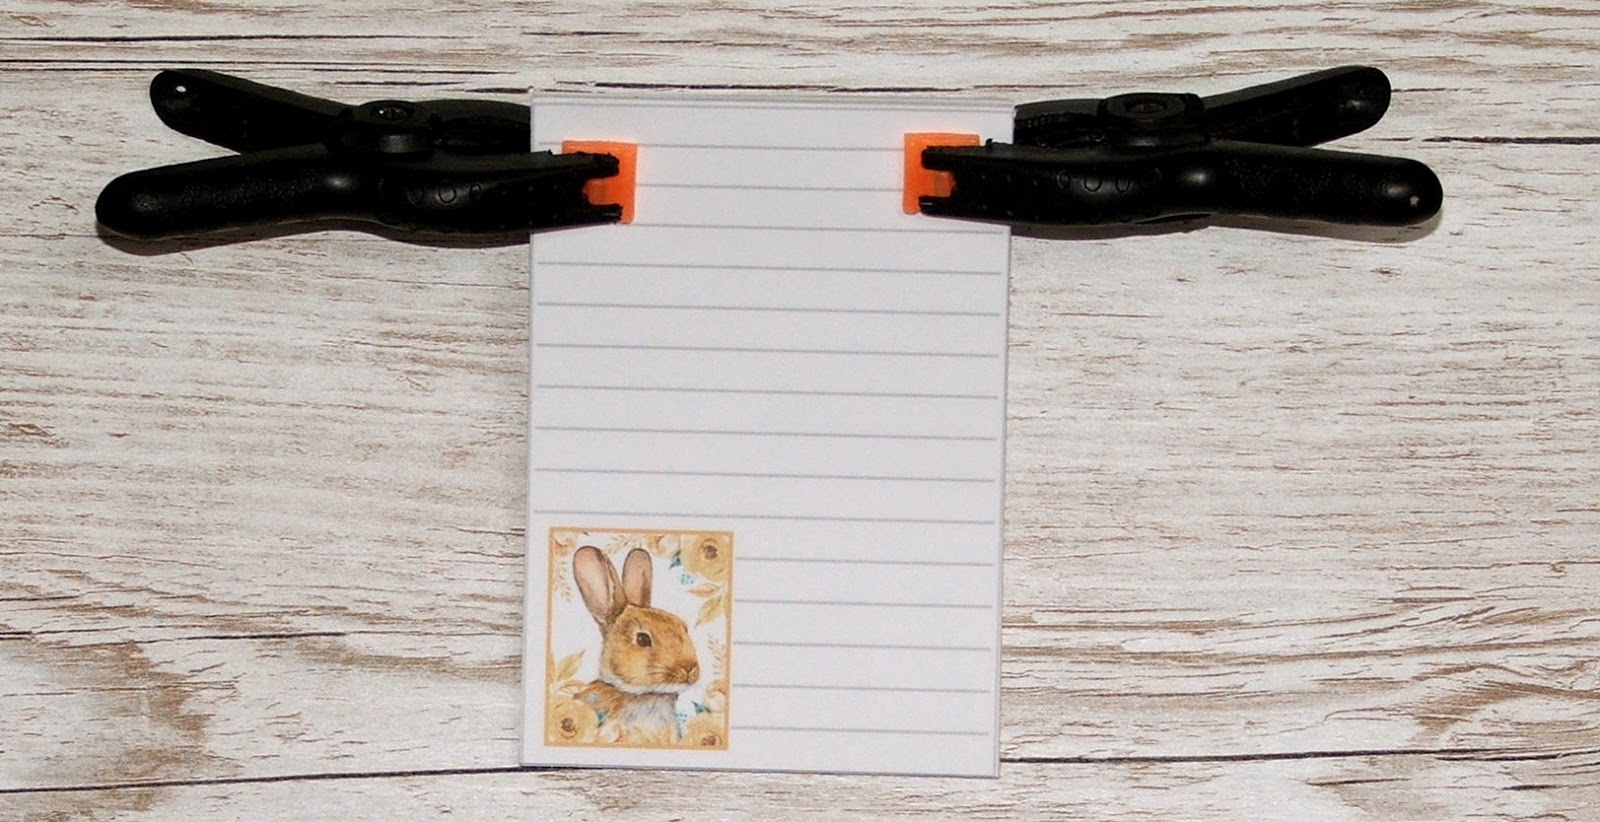
  1. Bundle all of the sheets together and make sure all the sides line up and are straight, especially the top edges. Clip the bundle of papers together near the top of the pad using the spring clamps. You want the top of the bundle of papers to be nice and tight and firmly squeezed together.
  1. Take the top off of the tacky glue and squeeze a generous amount along the top of the paper bundle. You want to smooth it out either using your finger or a little piece of card but don't mash the glue into the top of the paper or you will get glue oozing in places you don't want it. Let that layer dry. Then squeeze a second layer of glue on top of the first once it has dried. Again, make it a generous layer, smooth it out and let it dry.

That's it! You have a great little notepad using some cute images.

Alternative ways to use the sheets

Instead of using the glue method, you can hold the sheets together using a fancy bulldog clip or punch holes along the top of the pad and fasten the sheets together with string or hinged book binding rings.  


You can also use the sheets for journaling or scrapbooking too.


Tuesday, 16 July 2019

New tutorial download for wildlife brooches

A quick update on another new downloadable tutorial. This time the 'step-by-step how to' show you how to make wildlife brooches using six original templates designed by me. It was inspired by some little polymer clay brooches I had as a child. They were so cute - a hedgehog, a rabbit and a sheep - and I wore them religiously. These brooches, although made of paper, are long lasting thanks to a coat or two of varnish and simple to construct.


The animals that are included are a fox, a seal, a bear, whale, a bird and a hen and were designed by me specifically for this tutorial. Each one is roughly 1.5 inches (4 cm) at its widest point.


There are 12 pages of instructions, 26 full colour photos and hints and tips on decorating them. However you can also use them for other kinds of jewellery (imagine some really cute little earrings) or for scrapbooking, card making and other paper crafts


I love these little guys. In my opinion they are just as cute as the polymer clay brooches I had as a child.

Saturday, 13 July 2019

New round, chunky paper bead tutorial

After five years I actually have a new paper bead tutorial for sale on Etsy. The EU's digital VAT (sales tax) on digital products put me off writing any more. However Etsy seem to be handling the submission of tax receipts to all countries now and with Etsy's changes to their search system I need to diversify a bit more. More digital products will be on the way including some new ones incorporating my art.

Anyway, about these beads, I saw this round chunky style of paper bead made in polymer clay, and more recently in ceramic, and love the shape. Something a little different from the usual style of paper beads but still very simple to do with a round paper punch. I actually came up with the idea three years ago but it has take me this long to think about making it into a tutorial - ahem!

round chunky paper bead tutorial digital download

They make great additions to bracelets, earrings and necklaces. You can choose the colours to suit your project and add any decorations you like - or leave them plain. You can also use them to decorate journals with planner charms or bejewelled bookmarks. As they are so light you can use them and not worry abut the weight.

round chunky paper bead tutorial digital download samples

As part of my digital download production line, I have a couple more tutorials in the pipework and hope to have them available soon.

Sunday, 17 February 2019

Journal Planner Charm Tutorial

Planners seem to be a big thing this year. Big ones, small ones, red ones, blue ones. OK, I'm starting to sound like Dr Seuss. But they do seem to be everywhere on blogs, YouTube and Facebook. Not to mention every kind of accessory you can imagine - and yes, I have been caught up in it all. I have not only bought several journals recently but I have been making them too. More on that in a future post.

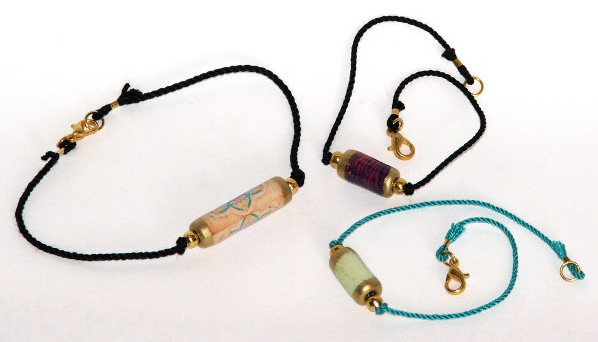
However, among the accessories I am seeing is 'journal jewellery' - planner charms that hang from the elastic of travel journals. When I saw the cute little charms I knew that my paper beads were ideal for the job - and so this little tutorial was born.

journal charm


Materials:
Wide hole beads (the ones here were made by me and, sadly, no longer available for sale)
Silk cord (available in my Etsy store)
Lobster clasp (or other clip for attaching the charm)
4mm jump ring
Thread (roughly 10-13cm (4-5 inches)

Tools:
Scissors
Pliers


how to make journal charms

Method:

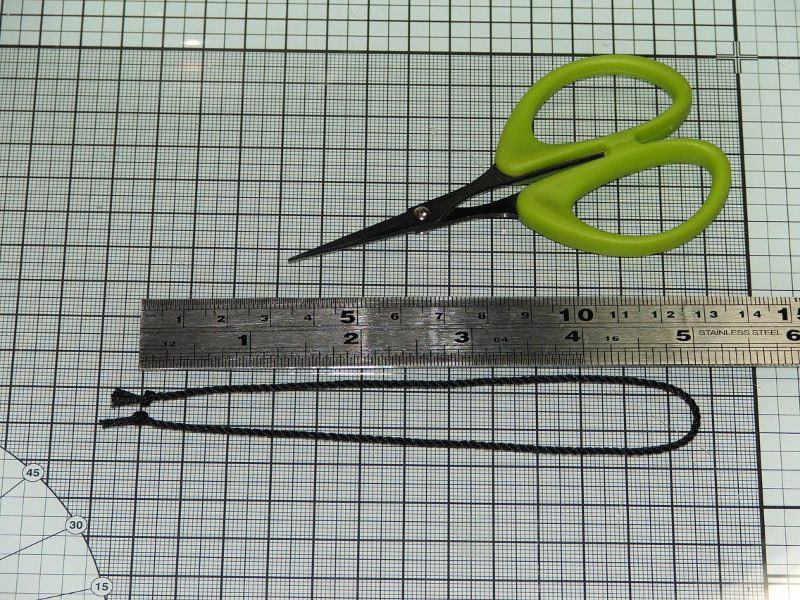
1. Cut a length of silk cord roughly 20-25cm (8 -10  inches) long. The longer the thread is the easier it will be to tie the knots in it. Fold the length of cord in half.


2. Place a piece of thread between the fold of the cord so it can be folded in half too. You are going to use it like a needle to thread the bead onto the cord.


3. Push both ends of the thread through the bead hole until they come out of the top. Then pull the bead onto the silk cord.


4. Tie a knot in the top of the cord where the fold is leaving a small loop to attach a jump ring onto.


5. Pull the bead up to the knot and tie a second knot underneath the bead.


6. Take the two loose ends of cord and tie one knot in each tail. Make the tails as long or as short as you like. Trim any excess cord from the ends.


7. Use pliers to attach a lobster claw using a jump ring.


8. That's it! Clip the charm into your journal. You can also use them on bags or as knitting and crochet stitch markers too.


journal jewellery

Please excuse the not-so-brilliant photos this time. It has been dull, grey and blowing a gale for the last two days and I could not get outside to take decent sample photos. Roll on Spring!

Monday, 6 August 2018

Silk cord and paper bead bracelet tutorial

Some time ago I wrote a tutorial for a bracelet kit I produced - then stopped selling the kits. I also stopped selling the small paper beads as they were too fiddly to work with but the instructions work really well with my longer beads too. So I thought I would share the tutorial here for anyone who has bought my paper beads or silk cords. If you are interested, I have another plain silk cord bracelet tutorial which you can find here. It doesn't use beads and makes a really nice stacking bracelet. I hope you will give them a shot.


These little bracelets evolved after I discovered how to make silk cord. I had been asked to make some tiny paper beads years ago and thought they would be ideal for making some simple jewellery. I hope you will enjoy using this tutorial and find it straightforward and fun.

Tools required:

Scissors (any scissors that can cut silk cord are fine)
Crimp pliers (also called crimping pliers or a crimp tool) and ordinary pliers for opening jump rings

Materials:


1) Threader x 1,    2) Lobster clasp x 1,     3) 5mm jump ring x1,    4) 4mm jump ring x 1,

5) 3mm crimps x 2,   6) 4mm metal spacer beads x 2    7) 1 inch long paper bead x1    8) Silk cord x 1

All these items can be found in my Etsy store:

Silk cords in a variety of colours
Paper beads
Findings


Method for a 8 inch (20.5cm) long bracelet: Tips are included for making a longer/shorter one.

 1. Put the end of the silk cord with the knot between the two legs of the threader. You can also use a piece of sewing thread in the same way as I use the threader.


2. Thread a crimp onto both legs of the threader.


3. Pull the crimp onto the silk cord so that a small loop forms. Don't pull the crimp all the way up to the knot. You will be trimming the knot off later. Leave a 'tail' of roughly half an inch (1cm) between the crimp and the knot.


4. Use your crimp pliers to squeeze the crimp closed. Trim the knot off of the short end of the silk cord leaving a short tail. You don't want the tail to pull out of the crimp at any time so make sure there is enough left. Three eights of an inch (8mm) should be plenty.


5. Measure three inches (7.5cm) along the length of the cord from the end of the loop. Tie a knot. If you have a thicker or thinner wrist then make this measurement longer or shorter, e.g. 2.5 inches (6.5cm) for a 7.5 inch (19cm) bracelet or 3.5 inches (9cm) for a 8.5 inch (20.5cm) one. These measurements were worked out using a 1 inch long bead, two 4mm spacer beads, a 4mm jump ring, a 5mm jump ring and a small lobster clasp but if you use different size beads you will need to adjust the measurement accordingly.


6. Treat the un-knotted end of the silk cord with a stiffening agent to form a makeshift needle. I apply PVA glue to the last half inch (1cm) of the unused end, squeeze it firmly and roll it. Leave it to dry for 10-15 minutes then cut through the glued part at a 45 degree angle to get rid of the knotted end and make a point. You can also use nail varnish, Diamond Glaze or Glossy Accents to get the same effect. Then thread one metal spacer bead on the cord followed by the decorative paper bead and then the other metal spacer bead.


7. Tie another knot to secure all the beads on the cord.


8. Place the long end of the silk cord through the legs of the threader as you did in step one. Measure three inches from the second knot (next to the beads) and move the threader to that spot. (Remember: if you used a different measurement in step 5, make this measurement the same, e.g. 2.5 inches (6.5cm) for a 7.5 inch (19cm) bracelet or 3.5 inches (9cm) for a 8.5 inch (20.5cm) one.) Pull the crimp onto the cord leaving a small loop. Squeeze the crimp closed with the crimp pliers.


9. Add the 4mm jump ring to one of the end loops and the 5mm jump ring to the other. Attach the lobster claw to the 5mm jump ring and you have finished your bracelet. Wear it with pride.


Copyright © 2015 Gillian McMurray. Please do not reproduce any part of this document without the express permission of the copyright holder.

Monday, 24 October 2016

New tutorials

I have finally got two more tutorials written. It's only taken two years, what with family life, the insane VAT changes from the EU government and a general lack of motivation to write any more tutorials because of it. But they are finally done and I have a few ideas for more.

The first tutorial is ideal for this season - how to make Dia de los Muertos brooches from paper. It covers making the base and how to decorate. I even included a few tips and hints on decorating them.


The second is how to make bejewelled Christmas tree bauble hooks. Made using copper wire and beads, they are quick to make and add that little bit of festive sparkle to what would otherwise be a boring hook.


As always, they can be found in my Etsy store.

Friday, 5 December 2014

The possible demise of my digi-tutorials

Unfortunately, due to new EU rules about VAT (a form of sales tax) on digital downloads that come into force on 1st January 2015, I may have to stop selling my digital downloads

The EU, in all its wisdom, has decided to change in which country VAT is applied to a digital download. Instead of being in the country of sale as it is now, it will be the country of purchase. That means I have to add VAT to every European digital sale I make from the 1st January. As each EU country has a different VAT rate, the rates vary from 15% to 27%. The appropriate amount has to be added to each EU sale. We also have to keep details of every sale for 10 years and keep records to prove that we have or have not sold to an EU country.


As you can probably tell, this is going to be a major chore for a tiny, one woman business.

What's more, whereas in the UK we have the protection of an £81,000 threshold before we have to register for VAT, the new rules mean that anyone selling even 1 penny's worth of digital download is liable to pay VAT in the country of sale. We have to register for VAT on an HMRC (Her Majesty's Revenue and Customs) website (or, alternatively, every one of the 28 EU states) and send in four VAT returns every year. It applies to crafters, artists, musicians, authors, app writers, broadcasters, suppliers of telecommunications and electronic services, big businesses, small businesses. It also applies to anyone in the world who is selling digi-downloads - not just EU sellers. If you sell digi then you're caught.


It's big, it's scary, it's a mess. Anyone on Twitter can follow the scared and angry tweets of loads of tiny businesses who have been caught up in this by using the hashtags #VATMOSS or #VATMESS. I am part of a group on Facebook that has been pushing for changes to these new laws to protect tiny businesses. We are writing to members of Parliament, members of the European Parliament, the media, supporters of small business and anyone else we think may be able to help. Whether it will help is another matter.

I have already seen posts by many crafters who sell tutorials and digital collage sheets saying they will have to close up shop or stop selling to the EU altogether because of this. At the least it means price rises. Budding starts ups wont even get off the ground. It is too complex for many cottage industries and tiny businesses to cope with and I do not think the EU has thought this through at all.


In my case what it comes down to is what Etsy chooses to do about the new legislation. They are supposed to collect the VAT instead of leaving it to the seller. Sadly they have not made an announcement about what they are going to do yet. If Etsy does not step up then I will have to stop selling the downloads. Digital downloads were meant to be a new arm to my business. Instead it has become a nightmare.

So this post is really a plea. If you fancy one of my digital tutorials then I suggest you grab it now. I do not want to put pressure on my customers and followers at all. I always appreciate every sale I make. I just want you to know that if you fancied trying out some of my techniques then it is possible that they won't be there for long. 


You can find the tutorials in my Etsy store.

Friday, 7 November 2014

Another new tutorial

Yes, another new tutorial on Etsy. This time it is for chunky paper beads. The beads are made from scraps of watercolour paper, are really simple to make and unusual to use in jewellery making or other crafts.


I am really enjoying writing these tutorials. I never saw myself as a teacher but I have so many little ideas for making simple things, particularly out of paper. It is really lovely to know that people want to find out about the projects.

Sunday, 5 October 2014

I'm on a roll!

My second downloadable tutorial is ready! Hooray! It seems I am on a roll. I had been struggling for months trying to get one done then I get two finished and a third written in one week.

This tutorial is for making paper jewellery components that I call Paper Pebbles. You can turn them into pendants, earrings, rings or brooches. You can even add them to scrapbook pages or cards if you want. I love the feel of them in my fingers. They are rounded and smooth - just like a pebble found on the beach - which is why I call them paper pebbles.


Here is a photo of some of the things I have made with the pebbles. They are very versatile, addictive to make and use watercolour paper, glue and some sanding skills. I hope they will inspire some people to create something a little different.


Wednesday, 1 October 2014

Tutorials!

I have started selling downloadable tutorials on Etsy! Yes, I have caught my fear by the tail, given it a shake and told it I was going to give this a go. Having been asked a couple of times in recent months to write tutorials for publications. So I thought I had nothing to loose in selling digital downloads of some of my paper jewellery ideas. I really hope people enjoy them. Personally, I have spent a small fortune on digital downloads for a variety of crafts and always enjoy learning new things from them. I would love to think that people are inspired by what I show them - and that I show them in a clear manner that makes it easy for them to learn.

The first digital download is for a Paper Bracelet Cuff. It is simple and uses watercolour paper, glue and some pretty papers to make a lightweight but sturdy and interesting item of jewellery.


My next download, which I hope will be up very soon (but I will keep you up to date here about that), is for paper jewellery components I call Paper Pebbles. After that I have another tutorial in my head. I just have to sit down and write it out. Who knows where this will go but I have enjoyed producing them. I hope people will enjoy playing with them just as much.